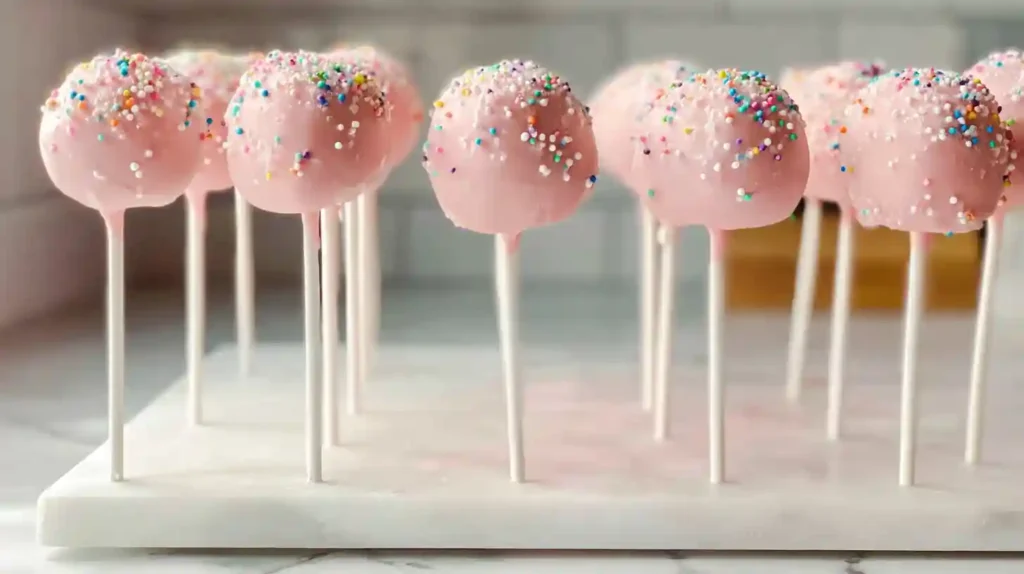
These Starbucks Copycat Birthday Cake Pops taste even better than the coffee shop version, and you can make over 30 treats for a fraction of the price. The secret is using a box mix with a couple smart upgrades and adding homemade buttercream to get that signature fluffy texture. You’ll be surprised how simple the process is once you know the tricks.
Making cake pops might seem intimidating at first, but this recipe breaks it down into manageable steps anyone can follow. The key is proper chilling between stages and weighing your balls so they stay on the sticks. Once you master this best cake pop recipe, you’ll have a go-to dessert for every occasion.
Why This Recipe Works
Most people struggle with cake pops because they skip essential steps or use the wrong ratios. This recipe solves those problems by adding milk instead of water to your cake mix, which creates better flavor and helps the crumb stay moist. The extra egg adds richness and acts as a natural binder when you roll the balls.
The homemade buttercream is what really makes these Starbucks recipes cakepops stand out. Store-bought frosting tends to be too sweet and can make your mixture too wet. This quick buttercream gives you control over texture and sweetness, resulting in pops that hold their shape perfectly.
Ingredients You’ll Need
For the Cake
- 1 box vanilla cake mix (any brand)
- 3 large eggs (one more than box calls for)
- 1 cup whole milk (instead of water)
- ⅓ cup vegetable oil
For the Buttercream
- 4 tablespoons unsalted butter, softened
- 1 cup powdered sugar
- 2 tablespoons heavy cream
- 1 teaspoon vanilla extract
For Assembly
- 12 oz pink candy melts
- 30 lollipop sticks
- Rainbow sprinkles
How To Make Cakepops Step By Step
Preheat your oven according to the cake box instructions, usually 350°F. Grease a 9×13 inch pan or line it with parchment paper. Mix the cake ingredients together, using milk instead of water and adding that extra egg. The batter will be slightly thicker than usual, which is exactly what you want.
Bake the cake but check it 5 minutes before the recommended time to avoid over-baking. A toothpick should come out with just a few moist crumbs. As soon as it comes out of the oven, transfer the hot cake to a large mixing bowl and crumble it completely using a paddle attachment, hand mixer, or your hands once it cools enough to touch.
While the cake cools slightly, make your buttercream by beating the softened butter until creamy, then adding powdered sugar, cream, and vanilla. Mix until smooth and fluffy. Add this buttercream to your crumbled cake and mix until everything is evenly combined. The mixture should hold together when squeezed but not feel overly wet.
Now comes the important part for how to make cake pops that actually stay together. Use a kitchen scale to portion out 30g balls, which is roughly 1¼ inches in diameter. Roll each portion between your palms until smooth and place on a parchment-lined baking sheet. Freeze for 15 minutes, no skipping this chilling step.
Melt your pink candy melts according to package directions, stirring until completely smooth. Dip each lollipop stick about half an inch into the melted candy, then insert it into a chilled cake ball, pushing halfway through. Return to the freezer for another 10 minutes to set the connection between stick and ball.
For the final coating, make sure your candy melts are thin and smooth, reheating if needed. Hold a cake pop by the stick and dip it straight down into the melted candy, tilting the cup to cover completely. Lift it out and let excess drip off, then gently tap the stick against the edge of the container. Immediately add sprinkles while the coating is wet, then stand upright in a foam block or empty egg carton to set.
Ingredient Swaps and Variations
You can easily customize these easy sweet treats recipes to match different themes or preferences. Try chocolate cake mix with chocolate candy melts for a double chocolate version. Funfetti cake mix adds extra color inside. For a lighter option, use almond milk instead of whole milk, though the texture won’t be quite as rich.
Switch up the coating colors for different holidays or events. White candy melts work for weddings, orange for Halloween, red for Valentine’s Day. You can even use melted chocolate instead of candy melts, though it requires tempering for the best results. Different sprinkle shapes and colors let you match any celebration theme.
Common Mistakes To Avoid
The biggest mistake people make with homemade cake pops is rolling them too large. Anything over 32g becomes too heavy and will slide off the stick no matter how well you chill them. Always weigh your portions for consistent results and fewer disasters.
Another common issue is using candy melts that are too thick. If your coating seems heavy or clumpy, reheat it in short bursts until it reaches a thinner consistency. Some bakers add a teaspoon of coconut oil to help thin the candy melts, creating a smoother coating that’s less likely to crack.
Skipping the chilling stages will ruin your bday food ideas faster than anything else. Each freeze time allows the cake to firm up and the stick to set properly. Rushing through these steps leads to cake balls falling off or coating that slides down unevenly.
Storage and Make-Ahead Tips
These Starbucks Copycat Birthday Cake Pops store beautifully at room temperature for up to 3 days in an airtight container. Keep them away from heat and direct sunlight, which can cause the candy coating to soften or develop condensation. For longer storage, refrigerate them for up to a week, but let them come to room temperature before serving for the best texture.
You can freeze uncoated cake balls for up to 3 months, making them perfect for planning ahead. Freeze them on a baking sheet until solid, then transfer to a freezer bag. When ready to use, let them thaw slightly in the refrigerator before dipping. Fully coated cake pops can also freeze for up to a month, thawing in the fridge overnight before serving.
FAQ
Can I use a homemade cake instead of box mix?
Yes, but box mix actually works better for how to make cake pop because it has a tighter crumb structure. If using homemade cake, make sure it’s slightly underbaked and very moist, or your pops may be too crumbly.
Why do my cake pops keep falling off the sticks?
This usually happens because the balls are too heavy (over 32g), the candy coating is too thick, or you didn’t chill them long enough between stages. Always weigh your portions and freeze at every step.
Can I make these without a kitchen scale?
You can try using a small cookie scoop, but a scale gives you the most consistent results for how to make sweets. Uneven sizes mean some pops will be too heavy and fall off while others turn out perfectly.
What’s the best way to thin candy melts?
Reheat them in 10-second bursts in the microwave, stirring between each interval. You can also add 1 teaspoon of coconut oil or shortening per cup of candy melts to create a thinner consistency.
Can I use store-bought frosting instead of making buttercream?
You can, but store-bought frosting is often too sweet and too wet, making it harder to achieve the right texture. The quick homemade buttercream in this recipe gives you better control and tastes closer to the original.
How far in advance can I make these?
You can bake and crumble the cake up to 2 days ahead, keeping it refrigerated. Coated cake pops stay fresh for 3 days at room temperature or up to a week refrigerated, making them perfect for party prep.

Starbucks Copycat Birthday Cake Pops
Ingredients
Equipment
Method
- Preheat oven to 350°F and grease a 9×13 inch pan or line with parchment paper.
- Mix cake batter using the cake mix, eggs, milk, and oil until smooth, then pour into prepared pan.
- Bake according to box directions, checking 5 minutes early to avoid over-baking. Cake is done when toothpick comes out with a few moist crumbs.
- Crumble hot cake immediately into a large mixing bowl using a paddle attachment, hand mixer, or your hands once cool enough to touch.
- Make buttercream by beating softened butter until creamy, then add powdered sugar, cream, and vanilla. Mix until smooth.
- Combine buttercream with crumbled cake and mix until evenly distributed throughout.
- Portion mixture into 30g balls using a kitchen scale, rolling each between your palms until smooth.
- Freeze cake balls on a parchment-lined baking sheet for 15 minutes.
- Melt pink candy melts according to package directions until smooth.
- Dip each lollipop stick about ½ inch into melted candy, then insert halfway into a chilled cake ball.
- Freeze again for 10 minutes to set the stick connection.
- Coat each cake pop by dipping straight down into melted candy, letting excess drip off, then tapping stick gently on container edge.
- Add sprinkles immediately while coating is still wet, then stand upright in foam block or egg carton to set completely.
Notes
- Always weigh cake balls to 30g maximum for best results.
- Don’t skip any chilling steps or pops may fall off sticks.
- If candy melts are too thick, add 1 tsp coconut oil per cup.
- Store at room temperature up to 3 days or refrigerate up to 1 week.